


Tools You’ll Need for Glass Railing Installation
To install a glass railing with a U channel system, prepare the following tools:
Power drill
Circular saw
Hammer drill (for concrete base)
Stainless steel cutting saw (cold cut saw or bandsaw)
AXIA wedge tool or similar glass wedge tool
Step-by-Step Installation Process
1. Layout the U Channel
Mark the exact placement of the U channel on your balcony cap or stair floor where the glass panels will be installed.
2. Mark Corner Positions Based on Drawings
Refer to the provided installation drawings to accurately mark and position all corner U channel sections. This ensures proper alignment at all angled joints before cutting or fixing the straight channel pieces.
3. Drill Holes for Anchors
Predrill holes in the U channel for anchor screws.
For concrete: use 10*100mm expansion bolts
For wood: use 10*50mm screws with washers

4. Install the U Channel
Secure the channel using anchor bolts. Check for level and plumb alignment, and shim where necessary before fully tightening all bolts.
5. Make Glass Templates
Cut 1/2″ plywood panels to match your intended glass height and width (ideally under 4 ft for easier handling). Leave a 1/2″ minimum gap between panels, and make sure the gap doesn’t exceed 3 15/16″.
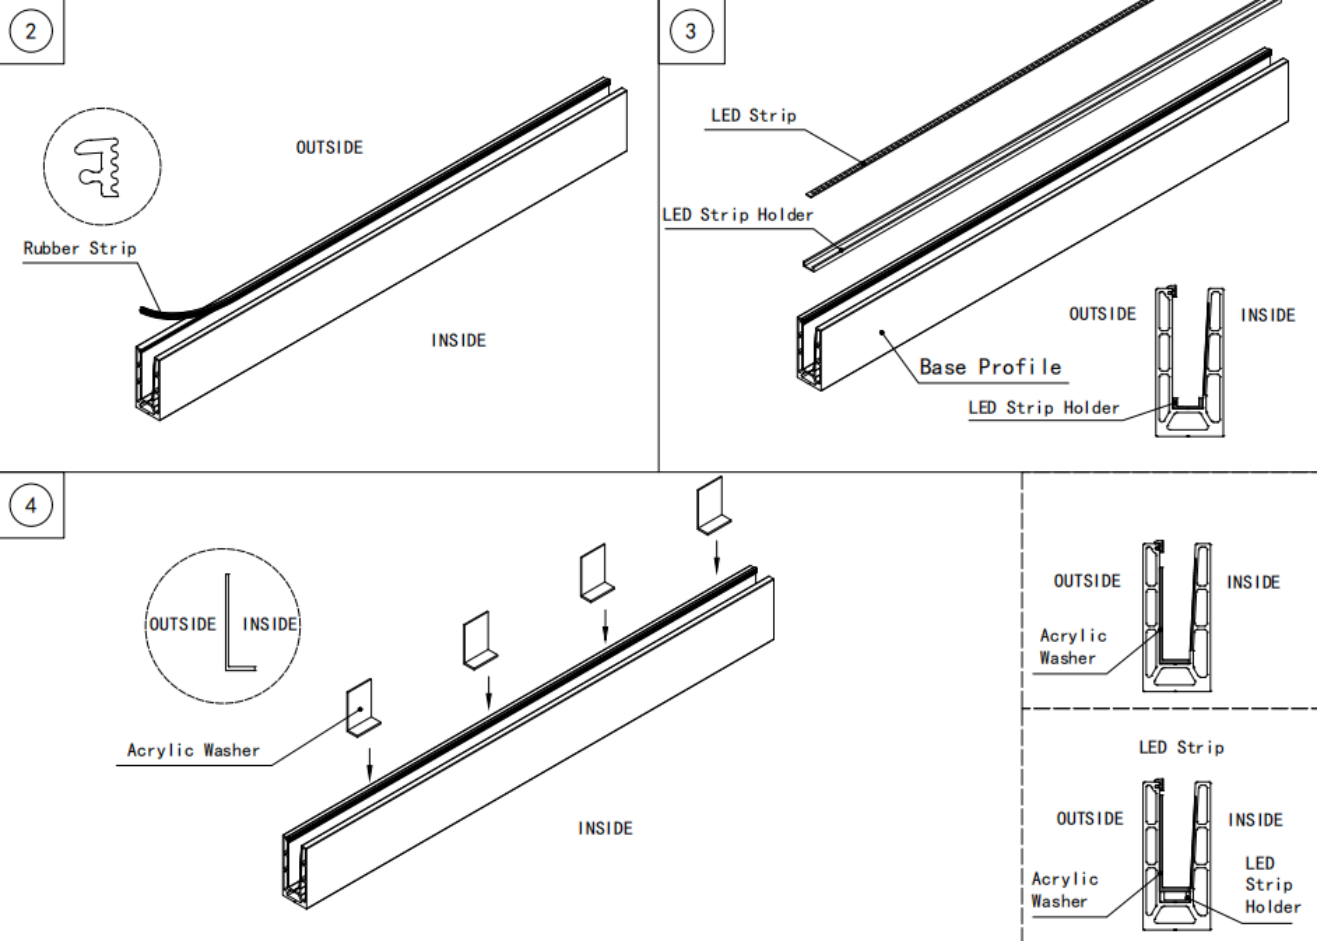
6. Insert White Support Shims
Place white plastic shims inside the U channel, along the F (forked) side. These should be spaced approximately every 10 inches (250mm) for stable support.
7. Add Rubber Gasket
Place the rubber T gasket along the outside edge of the U channel. Press it in firmly.
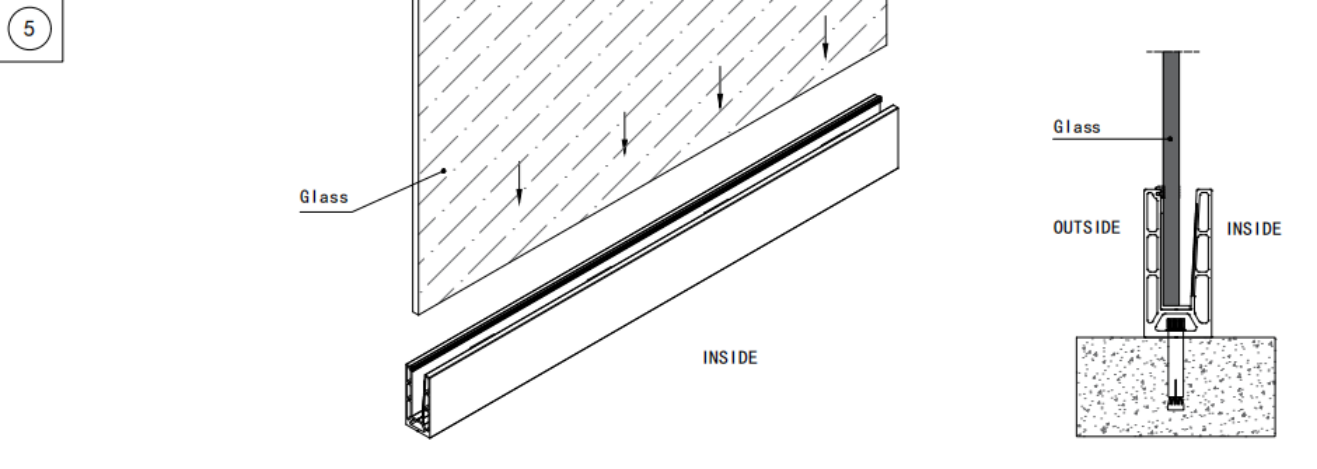
8. Insert the Template Panel
Place the plywood panel on the transparent shims and press it against the rubber gasket. Add 2-3 yellow shims on the inner side of the U channel to hold the panel securely.
9. Finalize Template Layout
Check all gaps and alignments. Mark each template with important details like job name, glass type, thickness, edge treatment, and tempered stamp location. Create a panel layout drawing for reference during installation.
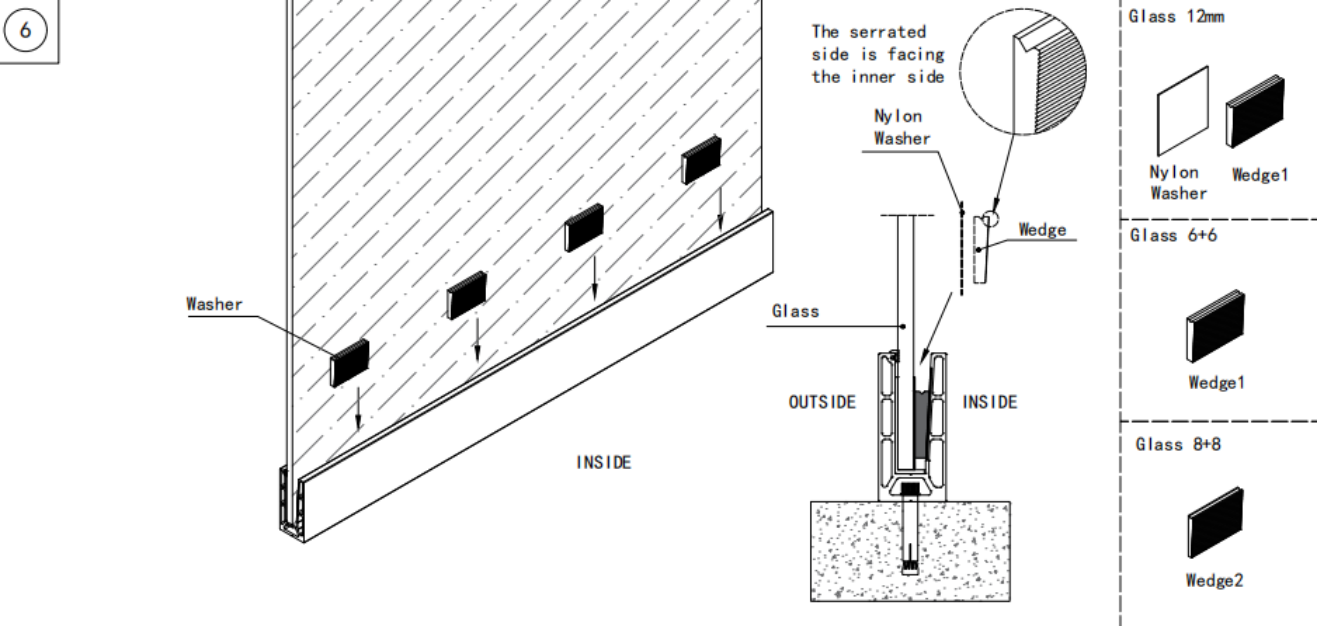
10. Install Tempered Glass Panels
Replace the plywood with actual glass panels. Place each panel on white shims and against the rubber gasket. Insert green shims on the inner side and drive them in using the wedge tool and a mallet until the panel is perfectly plumb.
Recommended shim quantity:
10 shims for 8’2″ length
20 shims for 16’4″ length
Final Notes
Always ensure that the tempered stamp on the glass is visible once installation is complete. This is critical for passing building inspections and reassuring future property buyers.
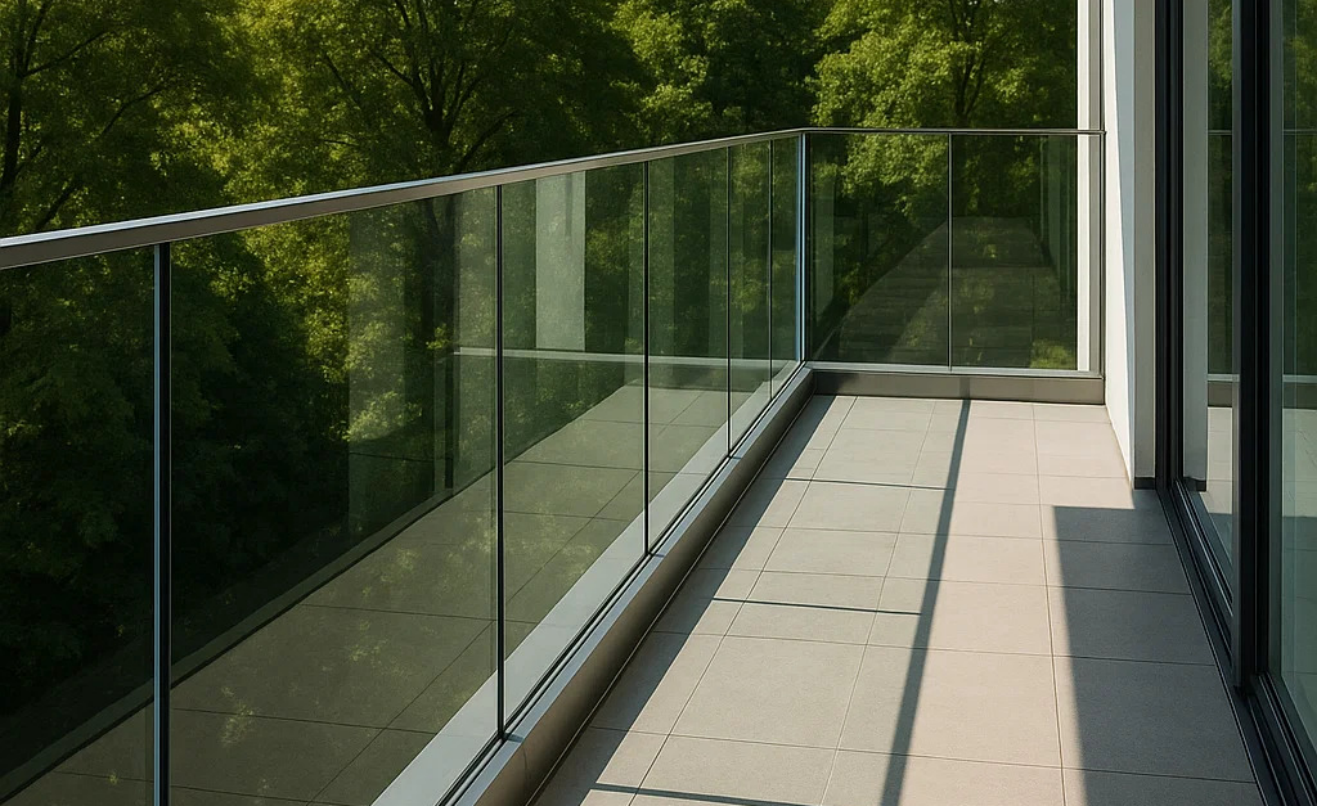
A well-installed frameless glass railing not only looks stunning but also meets safety standards when done properly.
11. Adjust and Align Glass
Check all gaps between panels and walls. If needed, remove and adjust shims using the wedge tool’s hook feature, then reinstall.
12. Insert the Closing Gasket
Spray lubricant (like WD-40) along the top inside edge of the U channel. Press the rubber closing gasket between the glass and U channel. Use a roller to firmly seat it. Wipe off any excess lubricant with a degreaser.
13. Finish with Stainless Steel Cladding
Remove the backing from the double-sided tape on the stainless steel cladding and press it onto the U channel. Cut to fit, and use matching end caps where needed
If you want to know more: Click here to contact me!>>>
Post time: Jun-11-2025