


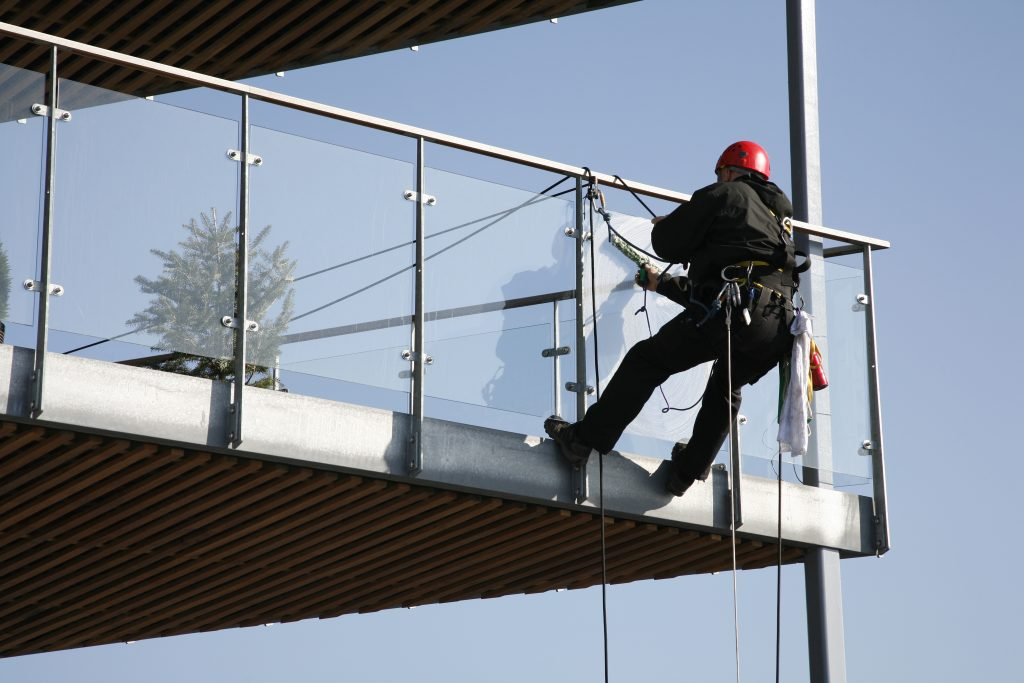
Installing a glass railing on a balcony is a great way to enhance safety while maintaining an unobstructed view. However, it requires careful planning, precise measurements, and adherence to local building codes. Below is a step-by-step guide to help you through the process:
1. Check Local Building Codes & Permits
Before starting, research your local building codes for balcony railings. Key requirements often include:
Minimum height (typically 36–42 inches / 91–107 cm).
Maximum gap between glass panels or posts (usually ≤4 inches / 10 cm to prevent falls).
Load-bearing capacity (railings must withstand lateral pressure, often 50–100 lbs/ft).
Type of glass allowed (tempered or laminated glass is mandatory for safety).
Obtain permits if required by your city or homeowners’ association.
2. Gather Tools & Materials
Tools
Measuring tape, level (2–4 ft), laser level, pencil, and chalk line.
Drill, drill bits (masonry bits if attaching to concrete), and screwdrivers.
Wrenches (socket or adjustable) and a rubber mallet.
Caulk gun, utility knife, and a glass suction lifter (to handle large panels safely).
Safety gear: gloves, safety glasses, and non-slip shoes.
Materials
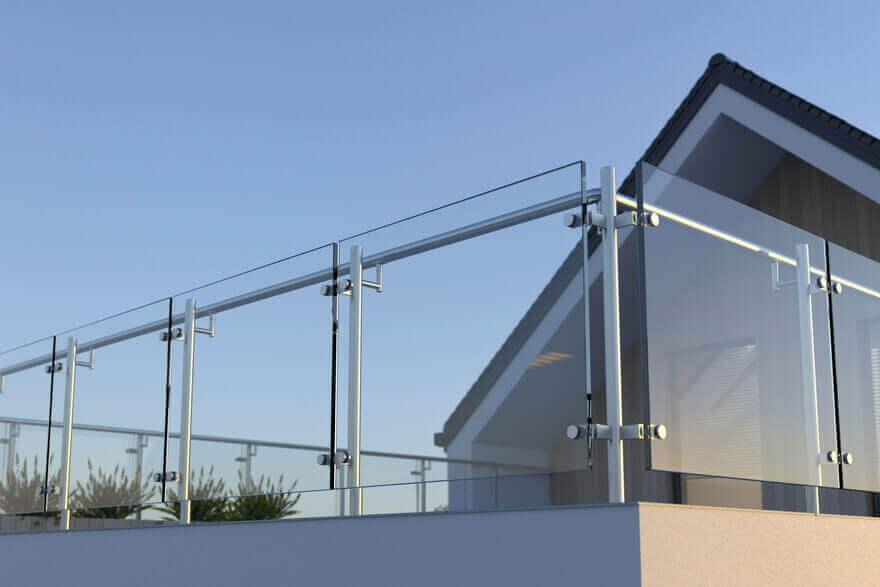
Glass panels: Tempered glass (minimum 1/4 inch thick) or laminated glass for extra safety. Custom-cut to fit your balcony dimensions.
Posts/frameless hardware:
Framed systems: Metal posts (aluminum, steel, or stainless steel) spaced 2–4 ft apart.
Frameless systems: Glass clamps, spigots, or channels (mounted to the floor/balcony edge) to hold panels without visible posts.
Fasteners: Stainless steel screws, anchors (for concrete/brick), and bolts (rust-resistant to withstand outdoor conditions).
Sealants: Silicone caulk (weatherproof, clear, and compatible with glass/metal).
Optional: End caps, decorative covers for posts, or rubber gaskets to cushion glass.
3. Prepare the Balcony Surface
Clean the area: Remove debris, old railings, or loose paint from the balcony edge/floor.
Mark measurements:
Use a tape measure and chalk line to mark where posts or hardware will be installed. Ensure spacing is consistent (follow building codes).
For level installation, use a laser level to mark straight lines along the balcony edge (this ensures glass panels align evenly).
Check for structural strength: The balcony floor or edge must support the railing. If attaching to concrete, ensure it’s solid; for wood, check for rot and reinforce if needed.
4. Install Posts or Frameless Hardware
Option A: Framed System (With Posts)
Position posts: Place each post at marked locations. Use a level to ensure they’re vertical (plumb).
Secure posts:
For concrete: Drill holes into the balcony floor, insert anchors, then bolt posts to the anchors.
For wood: Pre-drill holes to avoid splitting, then secure posts with stainless steel screws.
Tighten fasteners fully, but avoid over-tightening (which could warp posts).
Option B: Frameless System (No Posts)
Install base hardware:
Spigots (short metal tubes): Drill holes, secure spigots to the floor with bolts, and ensure they’re level.
Channels (long metal tracks): Mount the channel along the balcony edge using screws/anchors. Ensure the channel is straight and level.
Add gaskets: Insert rubber gaskets into channels or spigots to protect glass from scratches and allow for slight expansion.
5. Mount the Glass Panels
Handle glass carefully: Use suction lifters to lift panels (never carry by edges to avoid breakage). Wear gloves to prevent fingerprints.
Fit panels into place:
Framed system: Slide glass panels between posts. Most posts have slots or grooves to hold the glass. Secure with screws or clamps through pre-drilled holes in the posts.
Frameless system:
Lower panels into spigots or channels (ensure they sit evenly on gaskets).
Attach glass clamps (top and/or bottom) to secure panels to the floor or balcony edge. Tighten clamps gently to avoid cracking glass.
Check alignment: Use a level to ensure panels are vertical. Adjust as needed before fully securing hardware.
6. Seal & Finish
Apply caulk:
Seal gaps between glass and posts/hardware with clear silicone caulk. This prevents water infiltration and stabilizes the glass.
Smooth caulk with a wet finger or tool for a clean finish. Allow 24–48 hours to dry.
Add covers/end caps: Attach decorative covers to posts or spigots to hide fasteners. For channels, add end caps to seal ends.
Clean glass: Wipe away fingerprints or debris with a glass cleaner.
7. Final Inspections
Test stability: Gently push on the railing to ensure it’s secure (no wobbling).
Check for gaps: Ensure no gaps exceed building code limits (≤4 inches).
Verify weatherproofing: Confirm caulk is sealed properly to prevent water damage.
Safety Tips
Never use untreated glass (tempered/laminated glass shatters safely, reducing injury risk).
Enlist a helper when handling large glass panels (they’re heavy and fragile).
If unsure about structural work (e.g., drilling into concrete), hire a professional contractor.
By following these steps, you’ll have a durable, stylish glass railing that enhances your balcony’s aesthetics and safety. Always prioritize compliance with local codes and use high-quality materials for long-lasting results!
Post time: Aug-12-2025